Funeral Potatoes has recently started offering funeral program templates and order of service on Etsy. (Yay!) These templates are easy to edit online without Microsoft Word.
When editing the funeral program templates, you can add your own photos and information such as name, date, obituary, order of service, funeral prayers, and much more. Then, the funeral programs can be downloaded and printed on your home printer. For more professional results, you can bring the funeral program file to a local professional printer.
Below are details on how to edit these funeral program templates.
Funeral Program Editing Video Tutorial
The following video is a quick introduction to editing the templates. For more detailed instructions, continue below the video.
Funeral Program Editing
The editing system used in these funeral program is called “Templett.” After purchasing the funeral program or funeral thank you card or other handout, you will receive a link to the Templett editor. In the following instructions, we will show the editing options in the Templett editing window.
Load your purchased funeral template
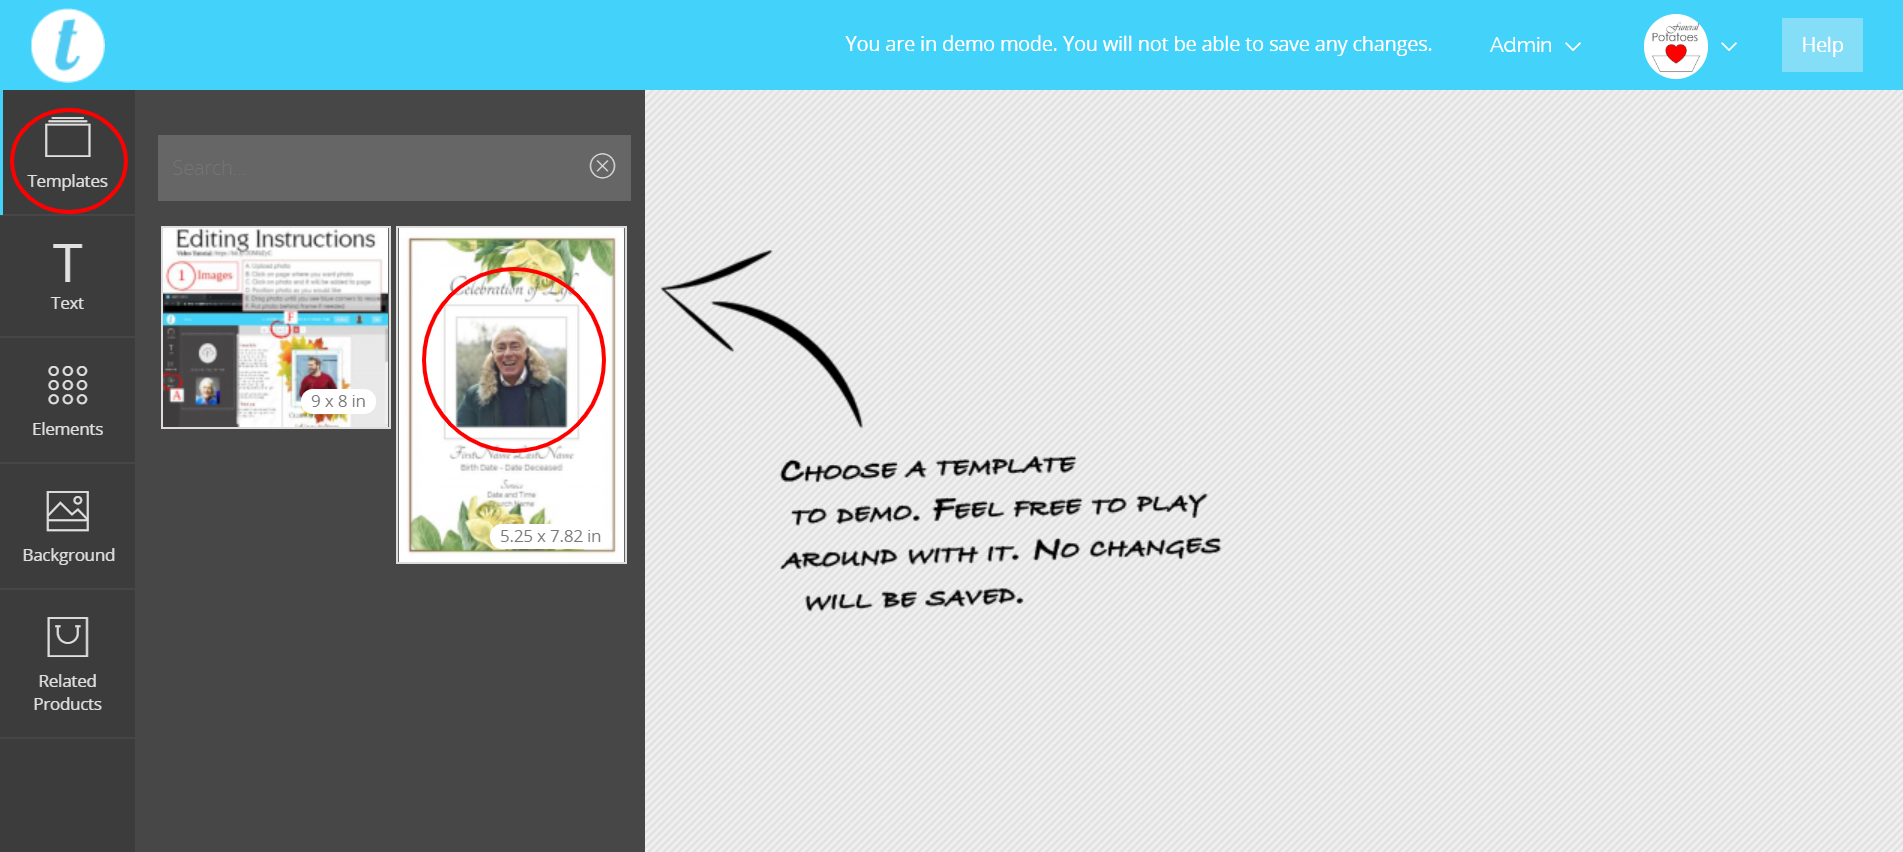 In the editor, first, load your template. On the left hand side, click “Templates.” Then, click on your template from the template area. Your template will then load in the editing area.
Editing images in your funeral template
Elements in the funeral program template
An element is a picture, text box, heading, or graphic element.
To select an element, click on it. A selected element that is active will appear to have a dotted blue line around it, as shown in the image. Some elements will not have a blue line, but a red dashed line, or none at all. The elements with red lines are locked in position, so they are not accidentally moved. They can be unlocked and then moved. Some elements that are integral to the design are permanent and unable to be moved.
To move an element, click on the element and drag the mouse. When you move an element to the middle horizontally or vertically, a thin pink line will appear. The pink line lets you know your funeral template element is centered. A thin green line will indicate that the element is centered to other elements on the page.
Uploading a photo in the funeral program template
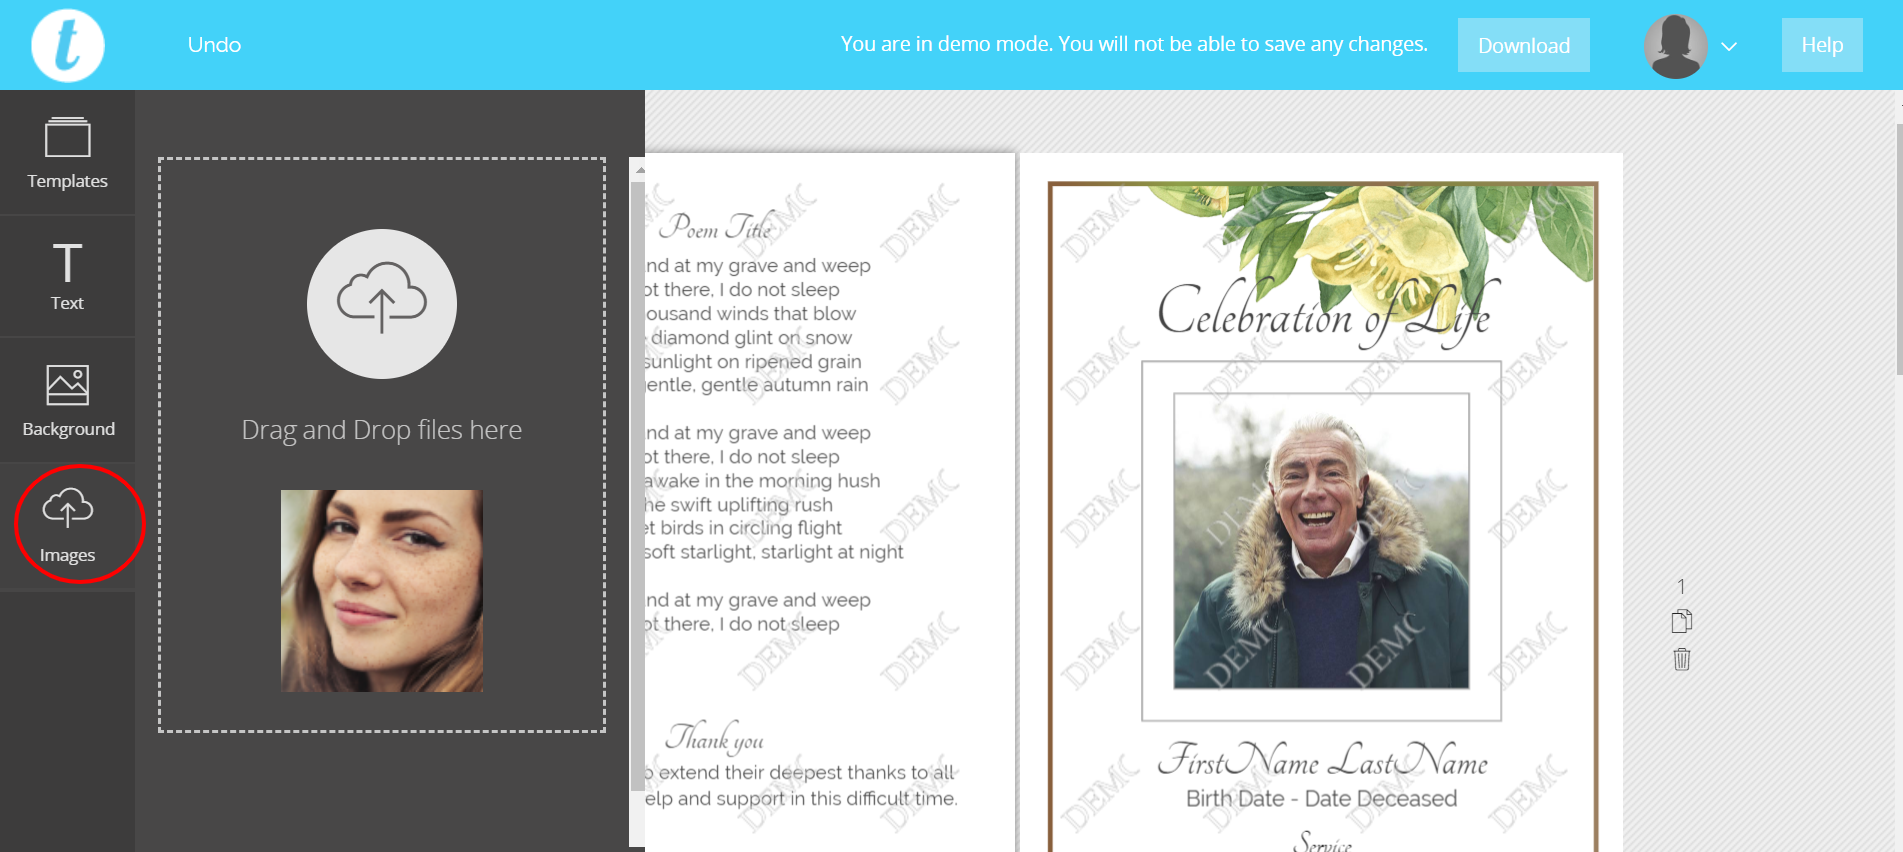 To upload an image, click on the images icon on the left tool bar. Then, click on the image of the cloud on the window that opens. Choose your file, and it will be uploaded.
To add the photo to your template, click on the page where you want the element. Then, click on the image icon, and the image you want to add. The image will then be added to the selected funeral program page.
Resizing an element
Often, an element such as a photo or heading needs to be resized. To resize an element, click on the corner blue square and drag it.
Only use the corner square to resize photos. Using the side squares will result in a distorted image.
Sometimes when a photo is added to the template, the photo is so large that the corner blue squares are not visible. In this case, drag the element until the blue squares are visible. Then the photo can be resized by dragging the corner square.
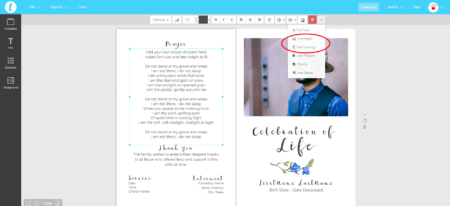
Clone an element in the funeral program

In the template editing area, the editor tool choices are seen in the center white bar above the template.
The left hand button is the clone button. This will simply duplicate the element that is selected. In this image, the photo of the man has been “cloned.”
Bring Forward and Send Backward
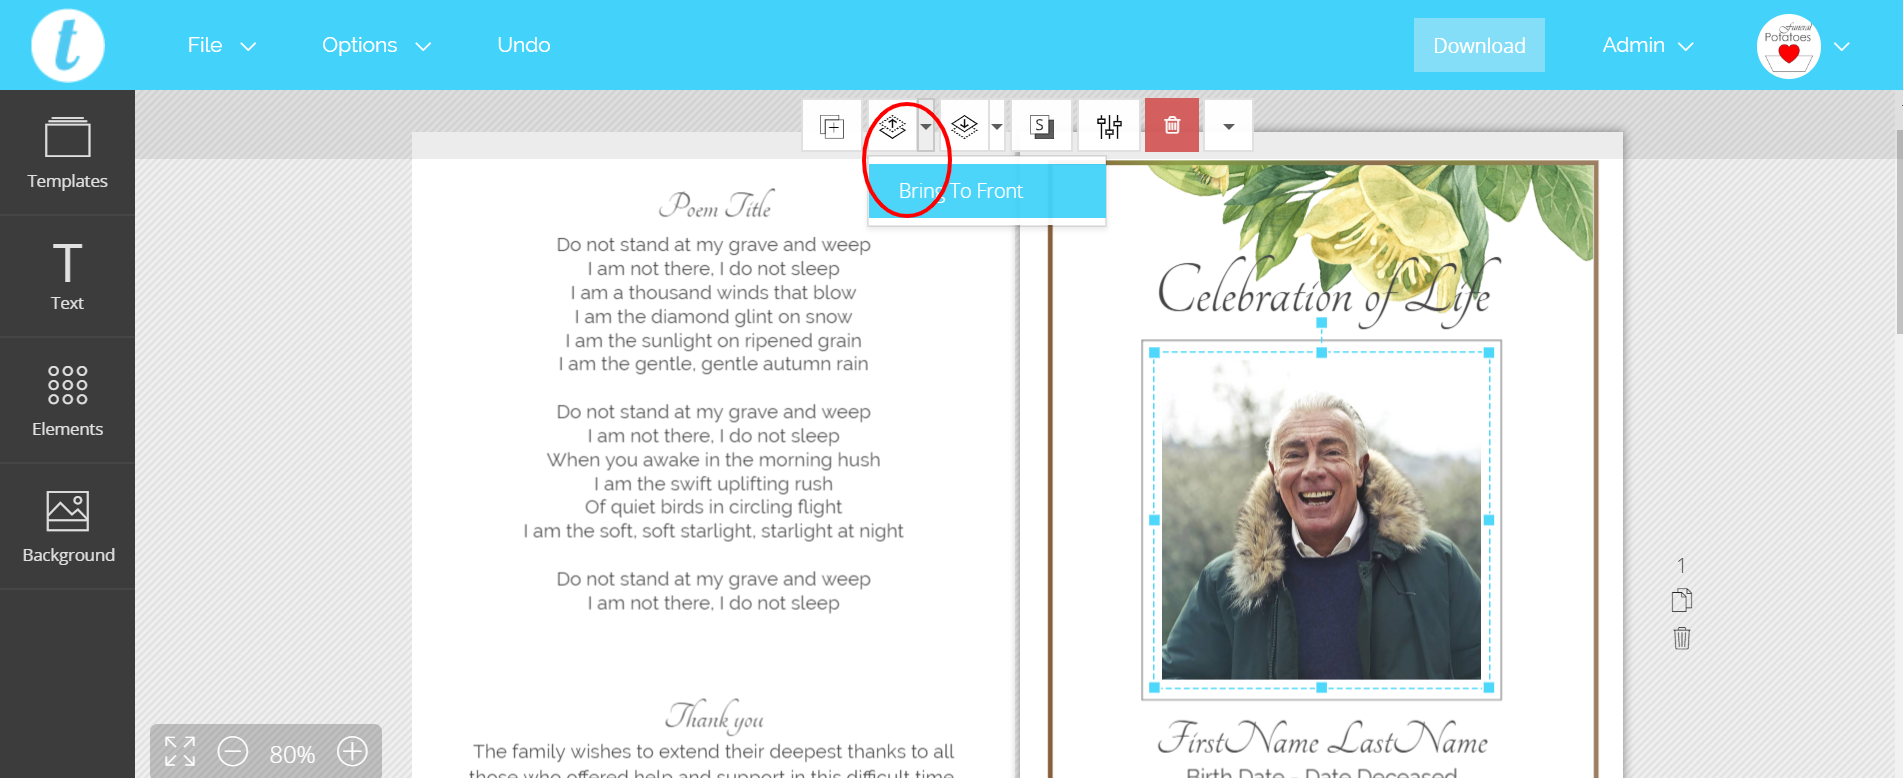
“Bring Forward” and “Send Backward” are the two next buttons. These will put the selected element in front of or behind other elements. This is helpful if you want to layer elements on top of each other. Some of the funeral program templates have graphic frames that show if a photo is put behind the frame.
In this example, the photo of the man has been put in front of the square frame.
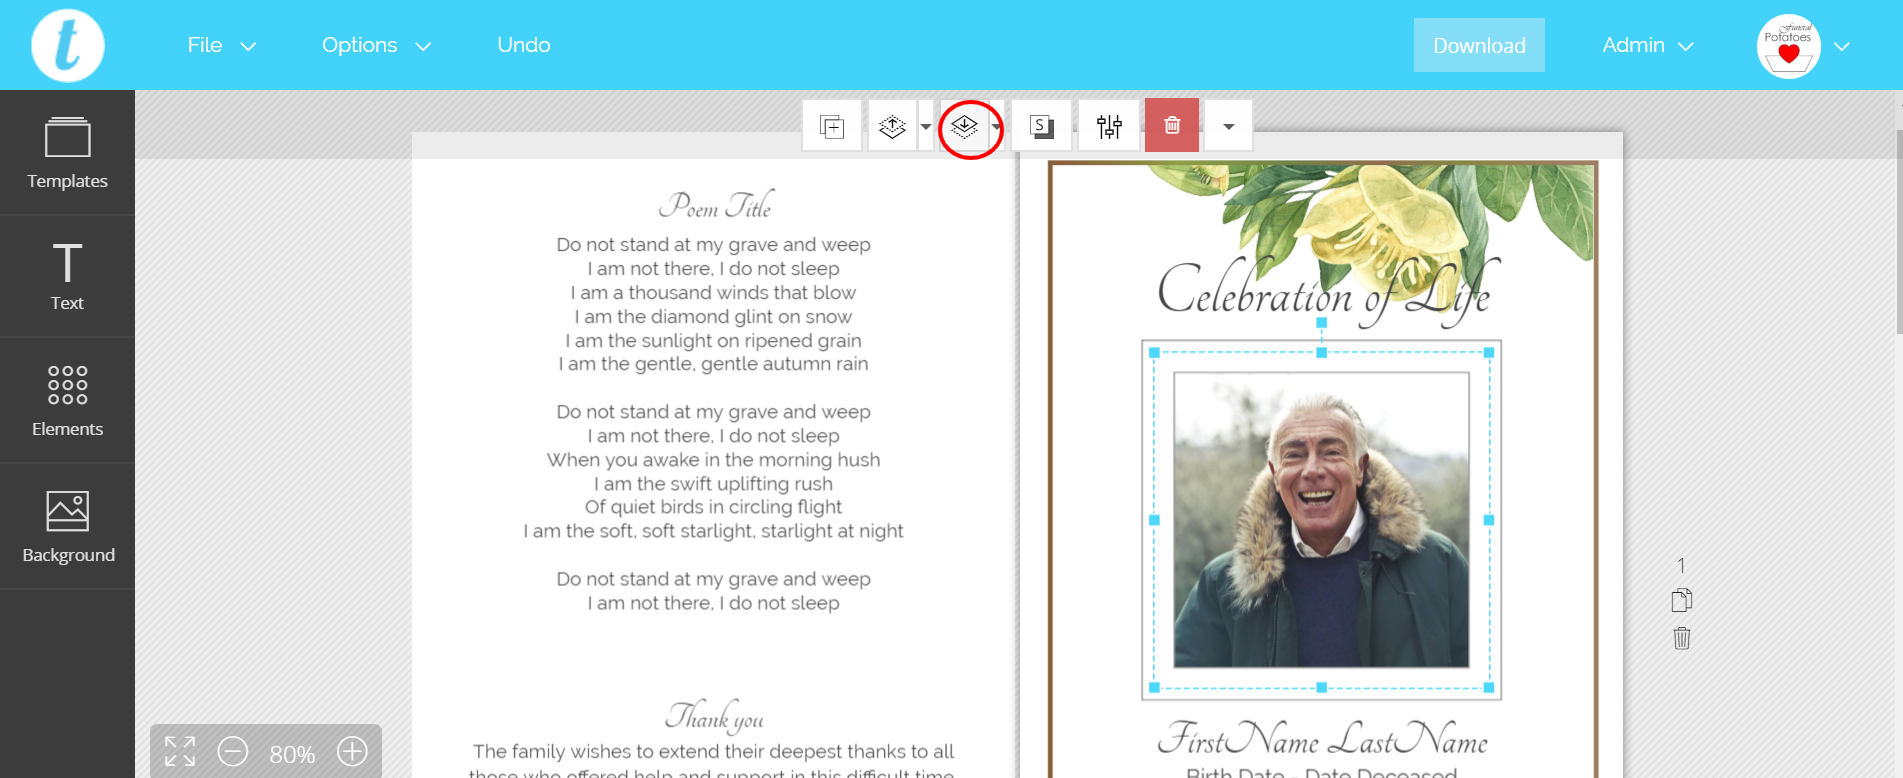
The following image shows the picture of the man after the “Send Backward” button is clicked. This has sent the picture behind the square frame.
Adding a drop shadow to the funeral program
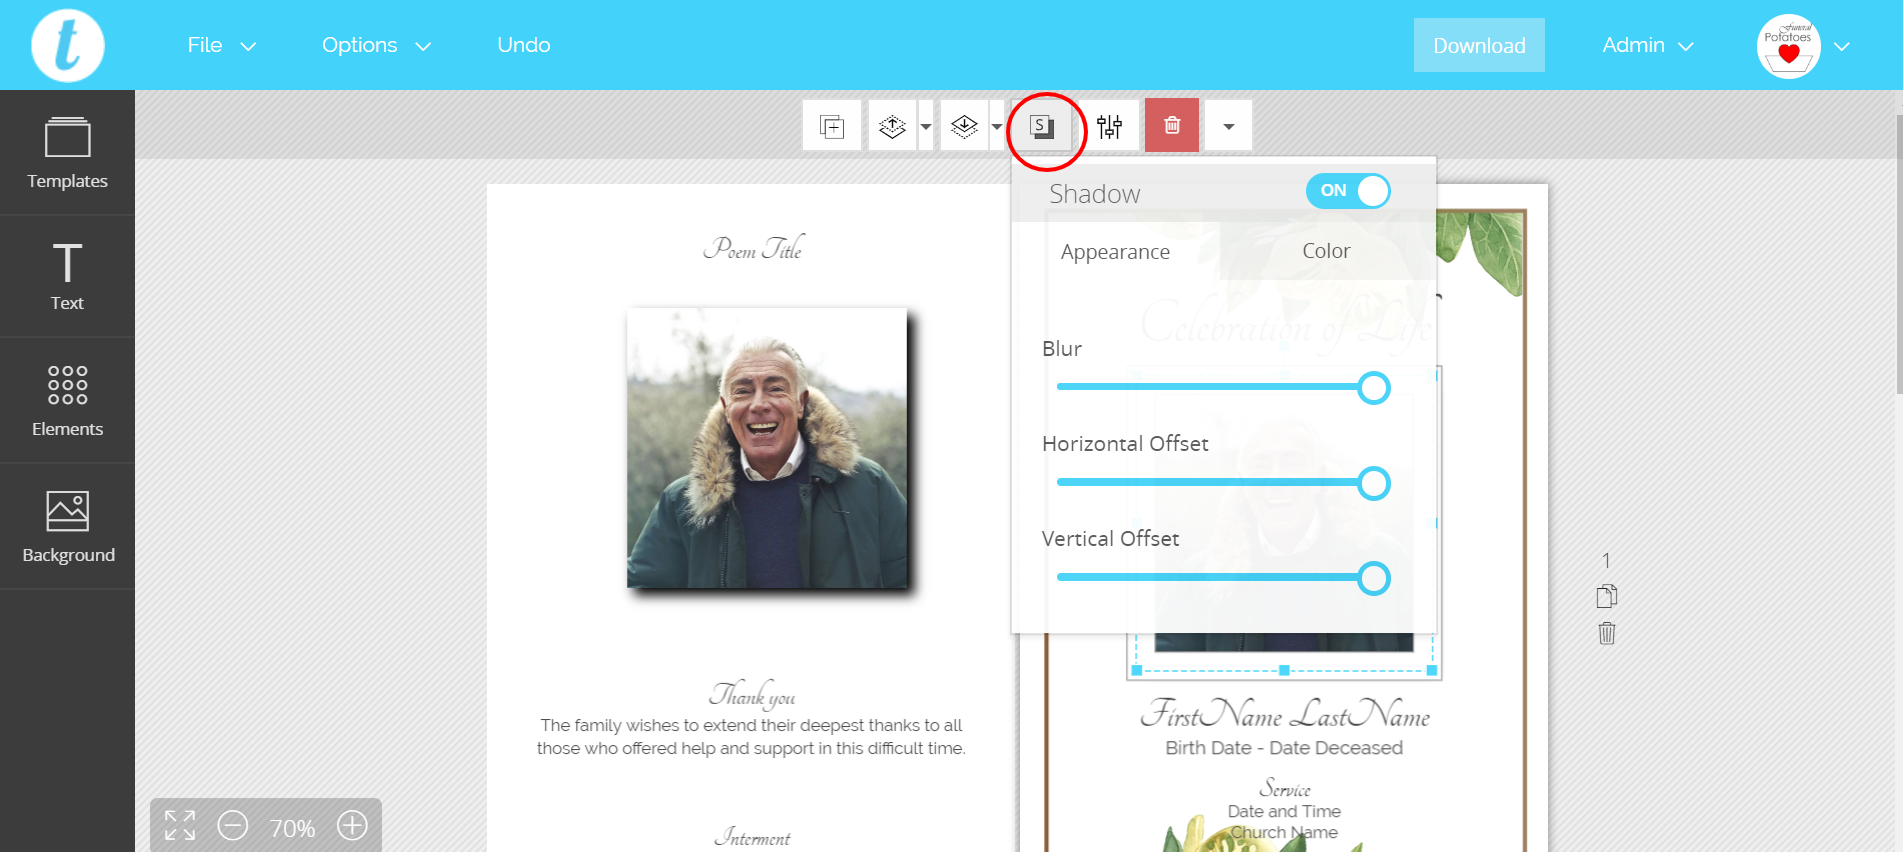 If you want a drop shadow to appear on an element, the button with the S is a drop shadow option. The following image shows a drop shadow on the photo to the left.
The options for drop shadow are blur, horizontal offset and vertical offset.
Object properties
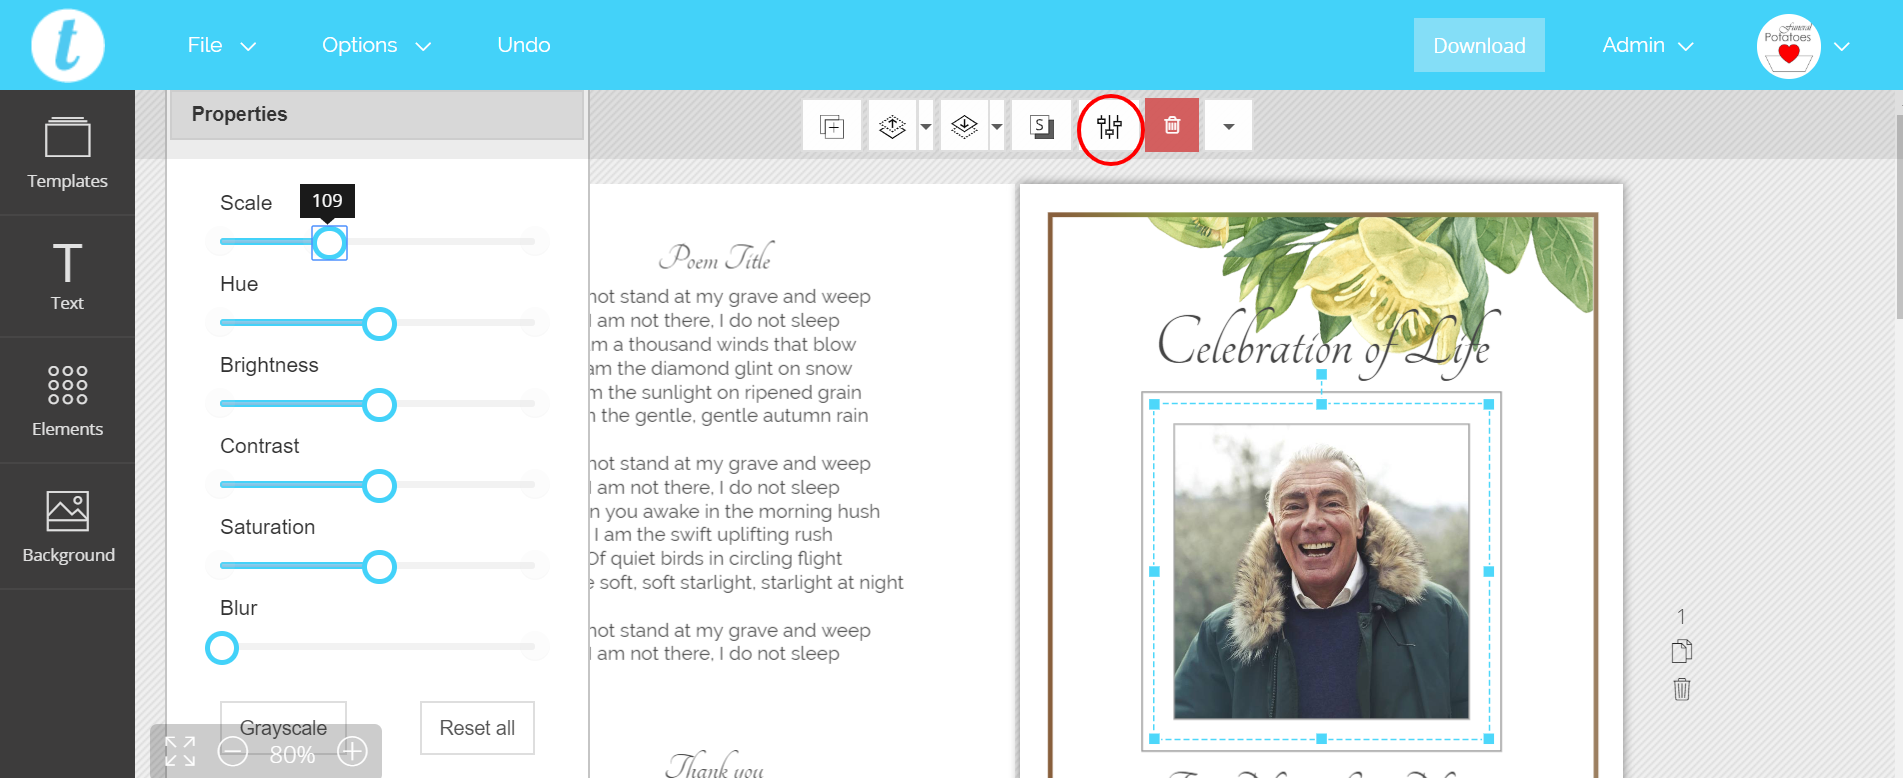 The next button controls object properties. If you photo is in good condition, you will not usually need to use object properties.
Object properties include scale, hue, brightness, contrast, saturation, and blur.
Scale will show what percent the image has been enlarged or reduced. Hue adjusts the color. Brightness and contrast will adjust how light and dark the highlights and shadows appear. Blur will blur the image. Sometimes it is helpful to blur an image that is in the background. However, it is not often used.
Deleting an element
When an element is selected, it can be deleted by clicking the delete button on the keyboard. Or, it can be deleted by clicking the red trashcan button in the editing bar.
Flipping an element
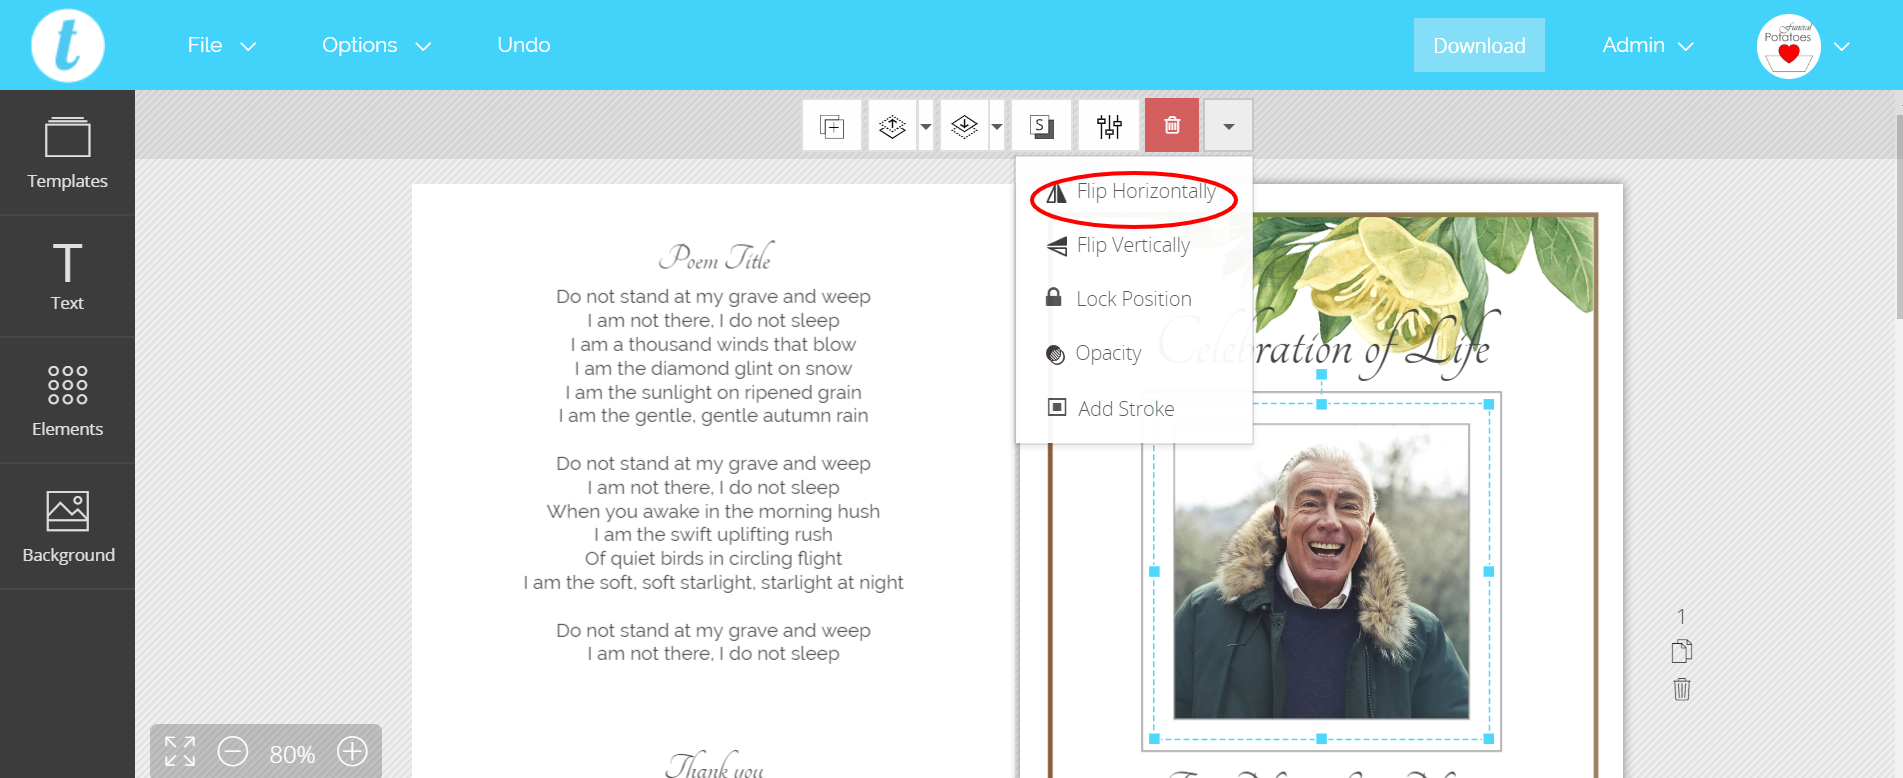
There are several more options under the triangle button to the right. The first is for flipping an element horizontally. This reverses the image from right to left.
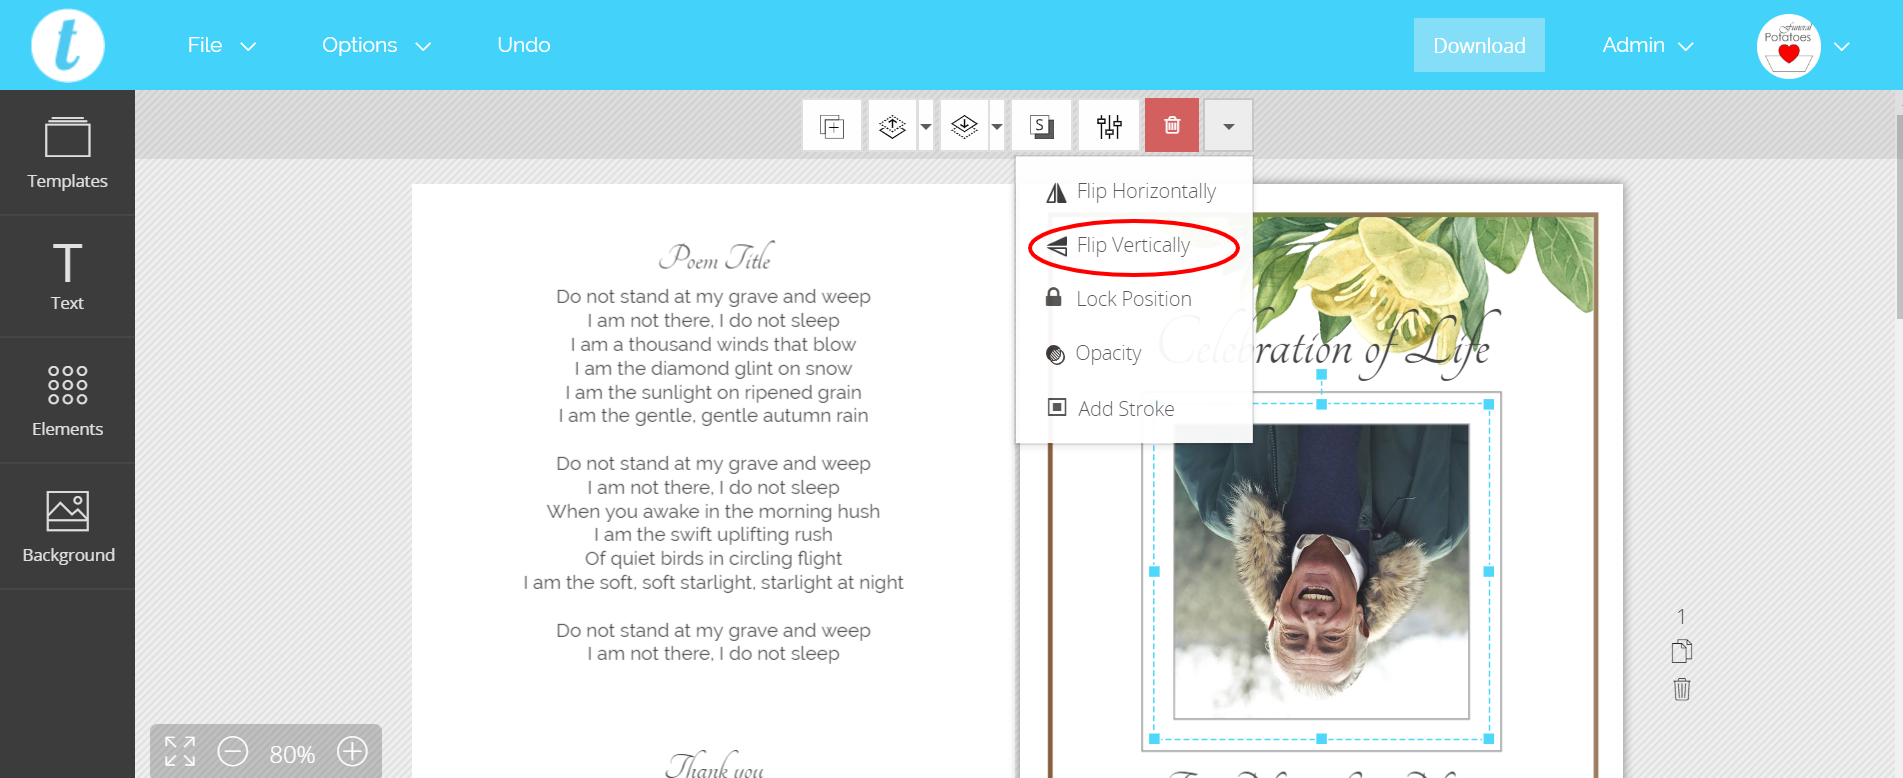
The “Flip Vertically” button reverses an image top to bottom.
Locking an Element in the Funeral Program Template
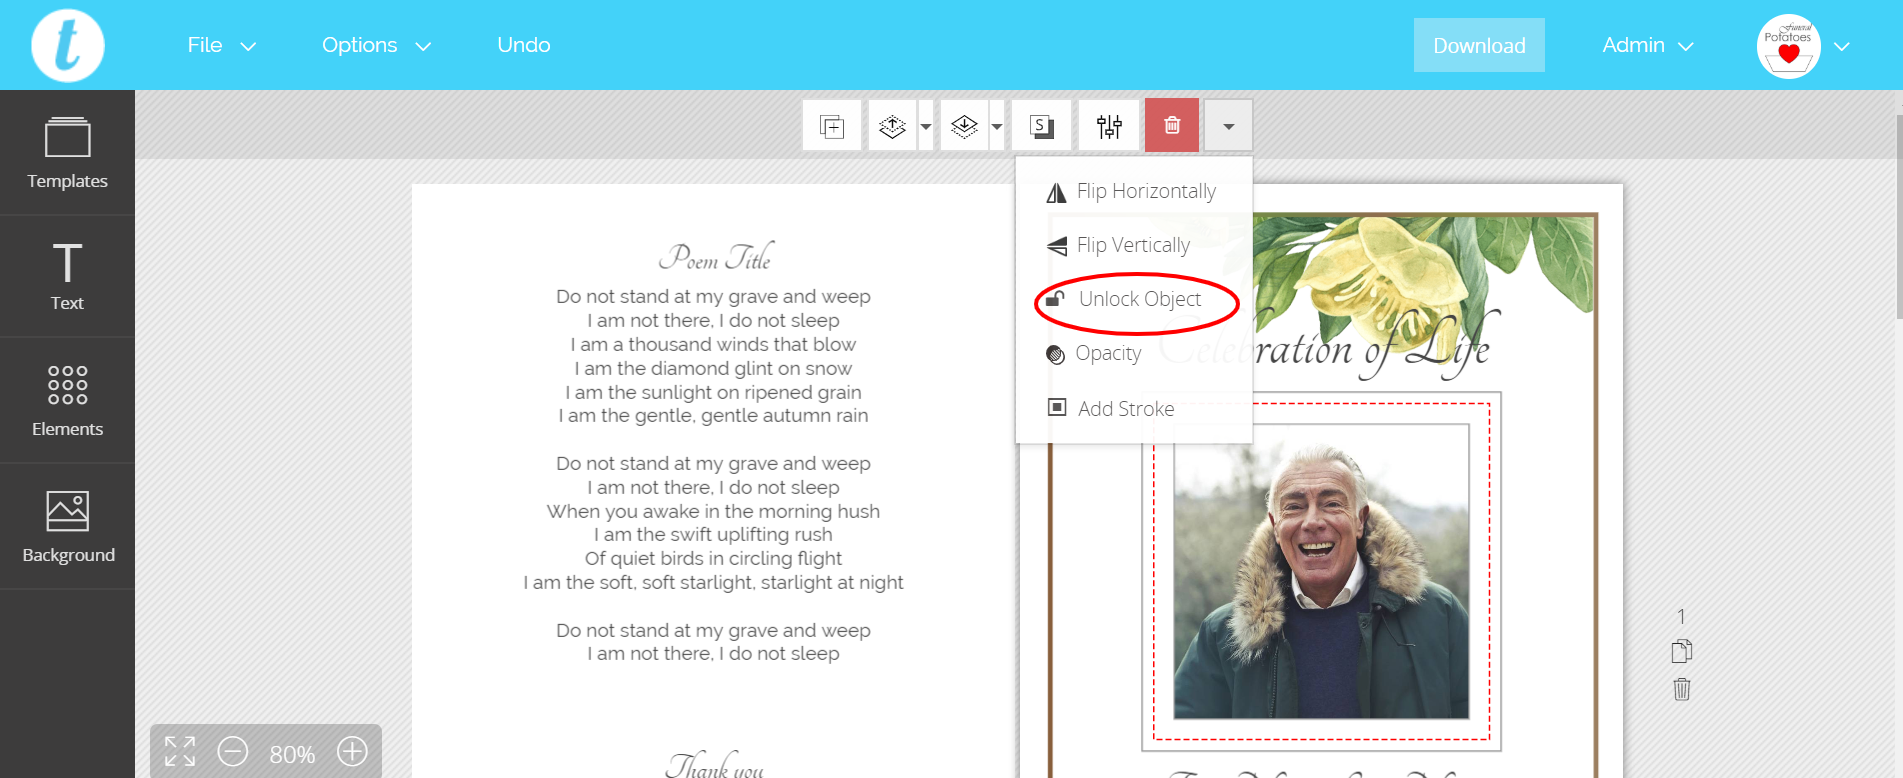
Under the “Flip Vertical” button is a very helpful editing button. This is the “Lock Position” / “Unlock Position” button. After adding an element, or moving to just the right place, you can lock the element so it does not move while you edit other things.
Likewise, if a funeral template element is locked, you can unlock it to move and resize it.
Adding a stroke to an element in your funeral program template
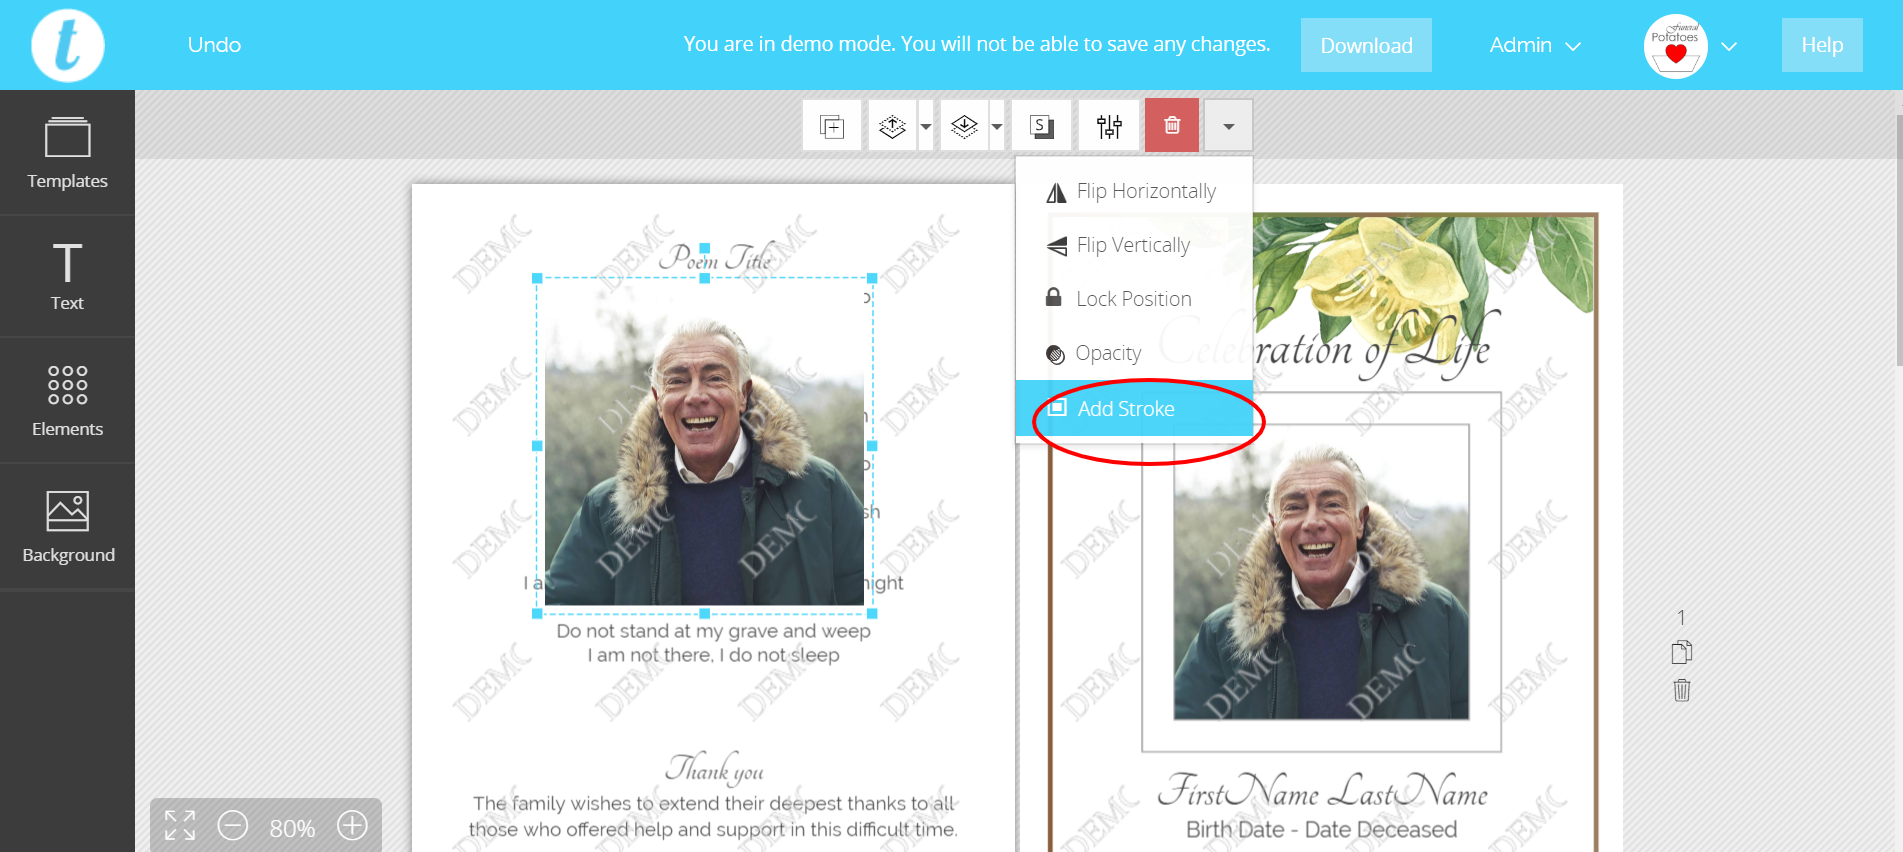
A stroke is an outline around an element. A stroke can be added around an element by clicking the “Add Stroke” button. The color and thickness of the outline can then be edited.
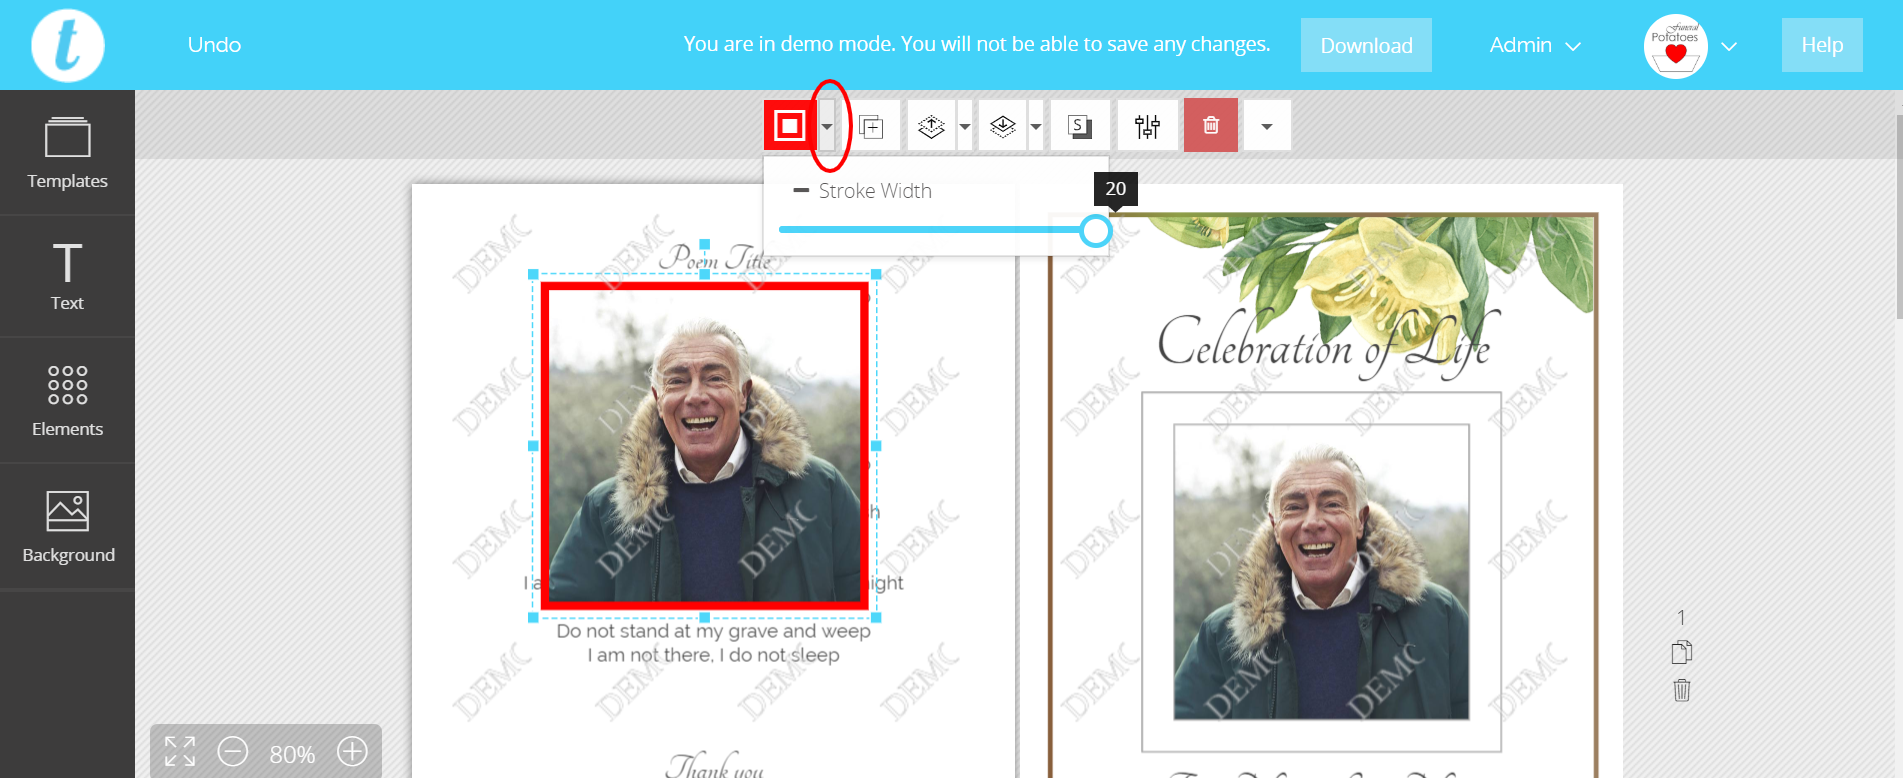
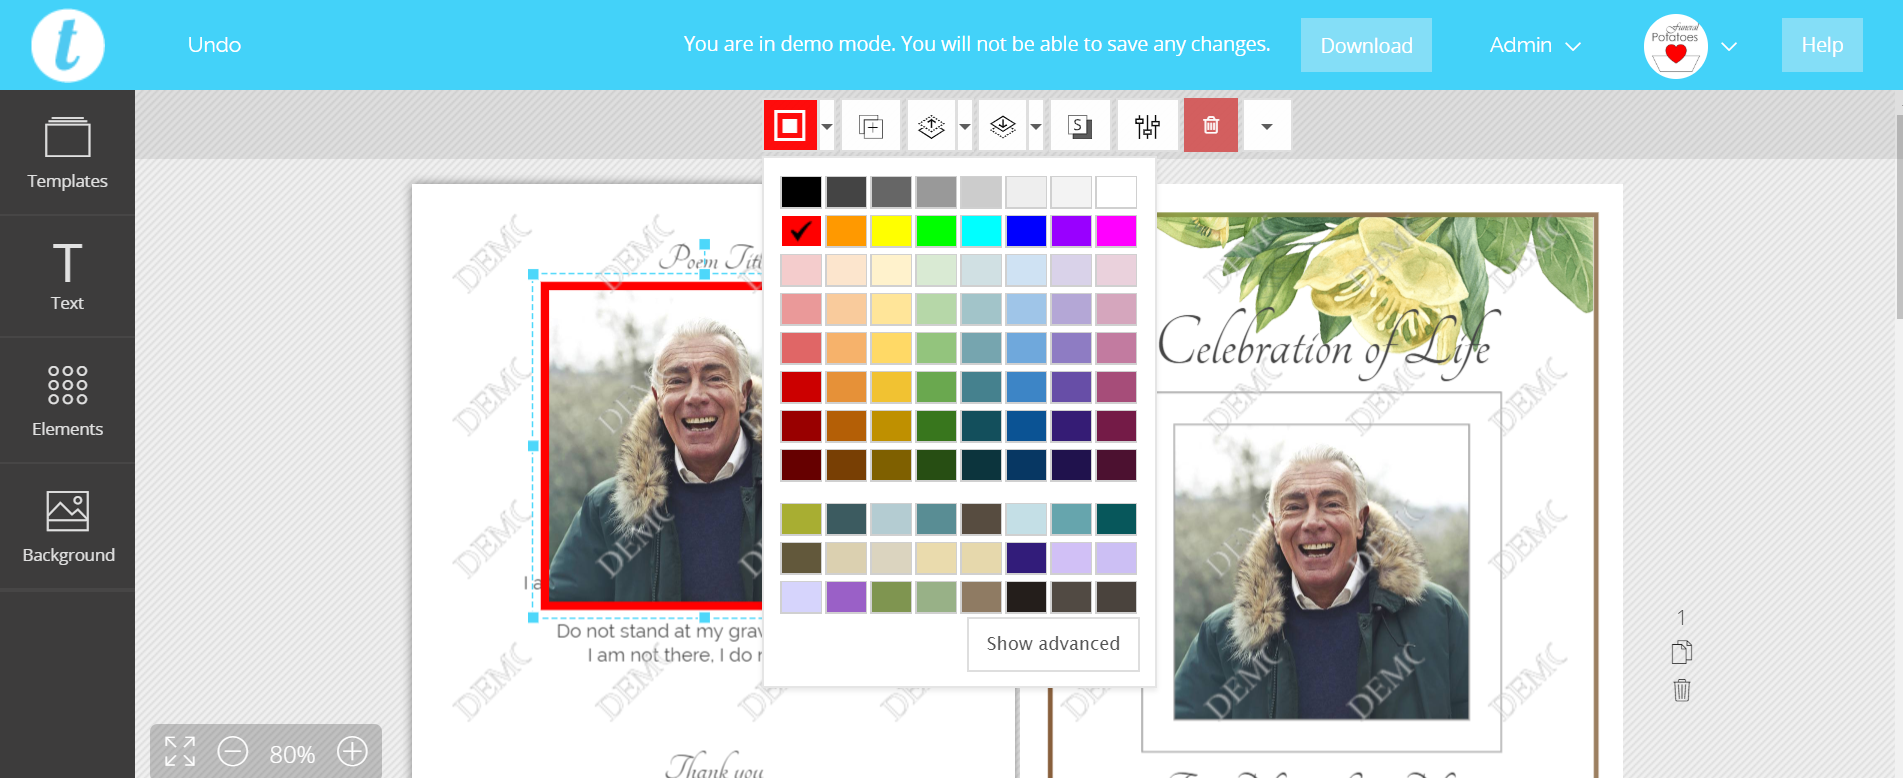 The following three images show how to add a stroke, and how to edit the thickness and color of the stroke.
Editing text in your funeral program template
Adding Text
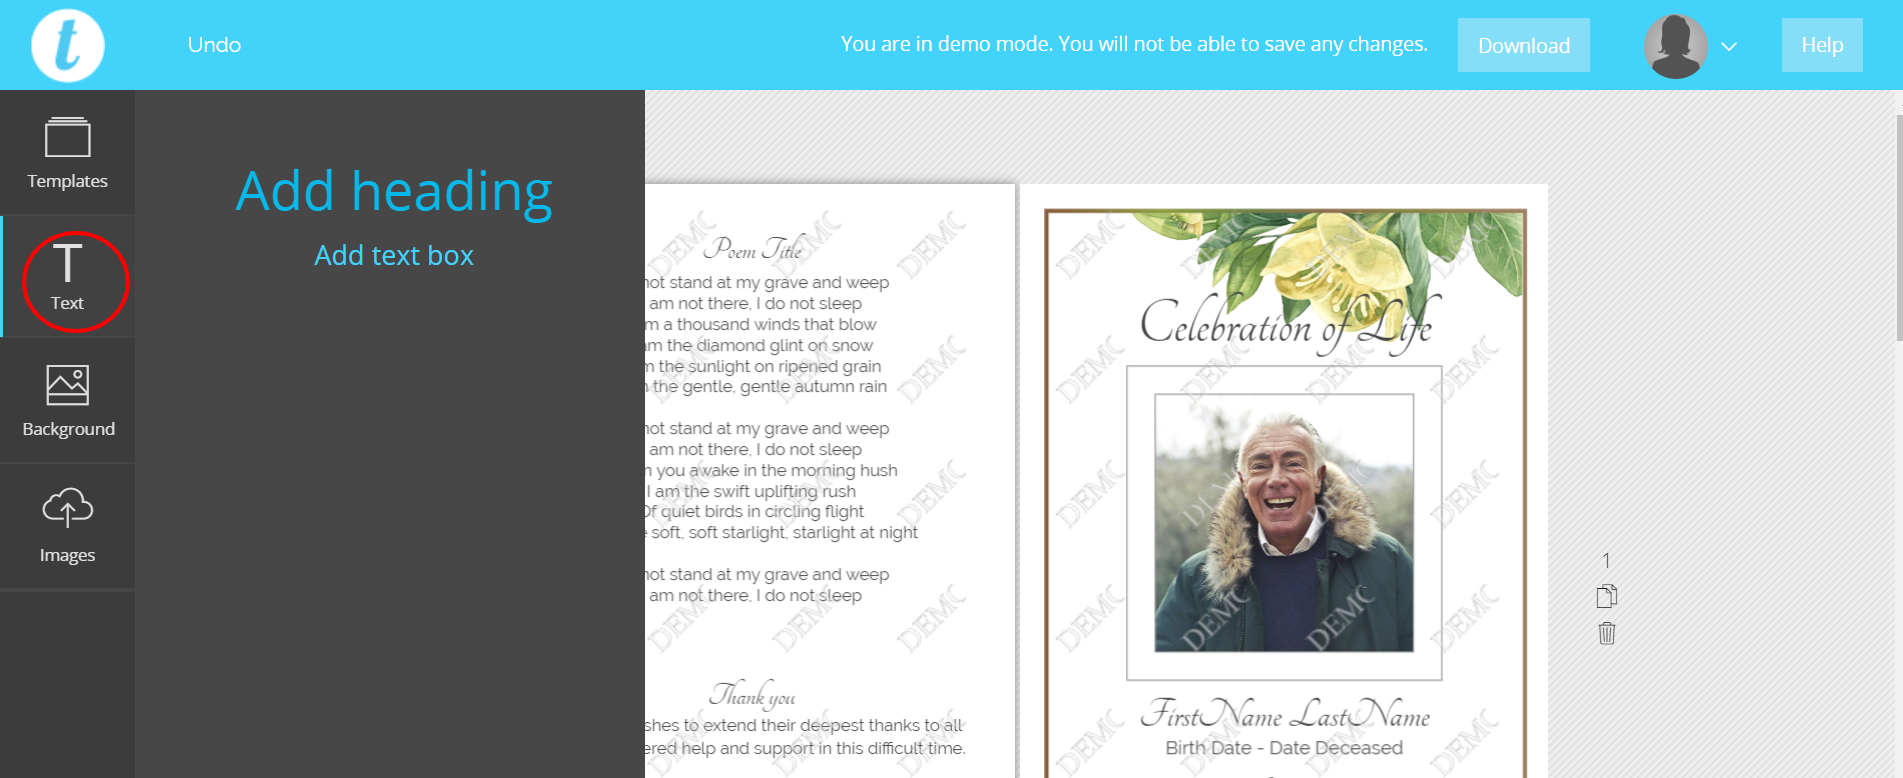 To add text, click the T icon on the left of the editing window. This will open a flyout window with the option to add a heading or add a text box. Clicking either option will add the box in the middle of the current page.
You can then click on the new text box to edit, or drag it to the desired location on the page.
Changing the Font

The Templett software comes with many options of font. There are also some specialty brush and script fonts that have been added so you can be creative in your choices.
To change the font, first select the text or header text block. Then, click on the font box in the upper left of the menu bar. A drop down will appear with a scroll. You can scroll down and click on your chosen font.
Changing the Funeral Program Font Color and Size

You may find you would like to change the font size to better fit your text into the funeral program template. To change the font size, in the upper menu bar, click on the number to the right of the font drop down. Click on the desired font size in the drop down list.
To change the color, click on the colored box next to the font size option. This will open a panel with color choices. You can choose any color from the color choices for the font. Just remember to choose a color that is easily legible.
Bold, Italic and Underlined font in the Funeral Program

Next to the color option in the upper menu bar are several options for font. Clicking the B will results in bold font.
To italicize the font, click on the I, and to underline the text, click on the U.
Font alignment
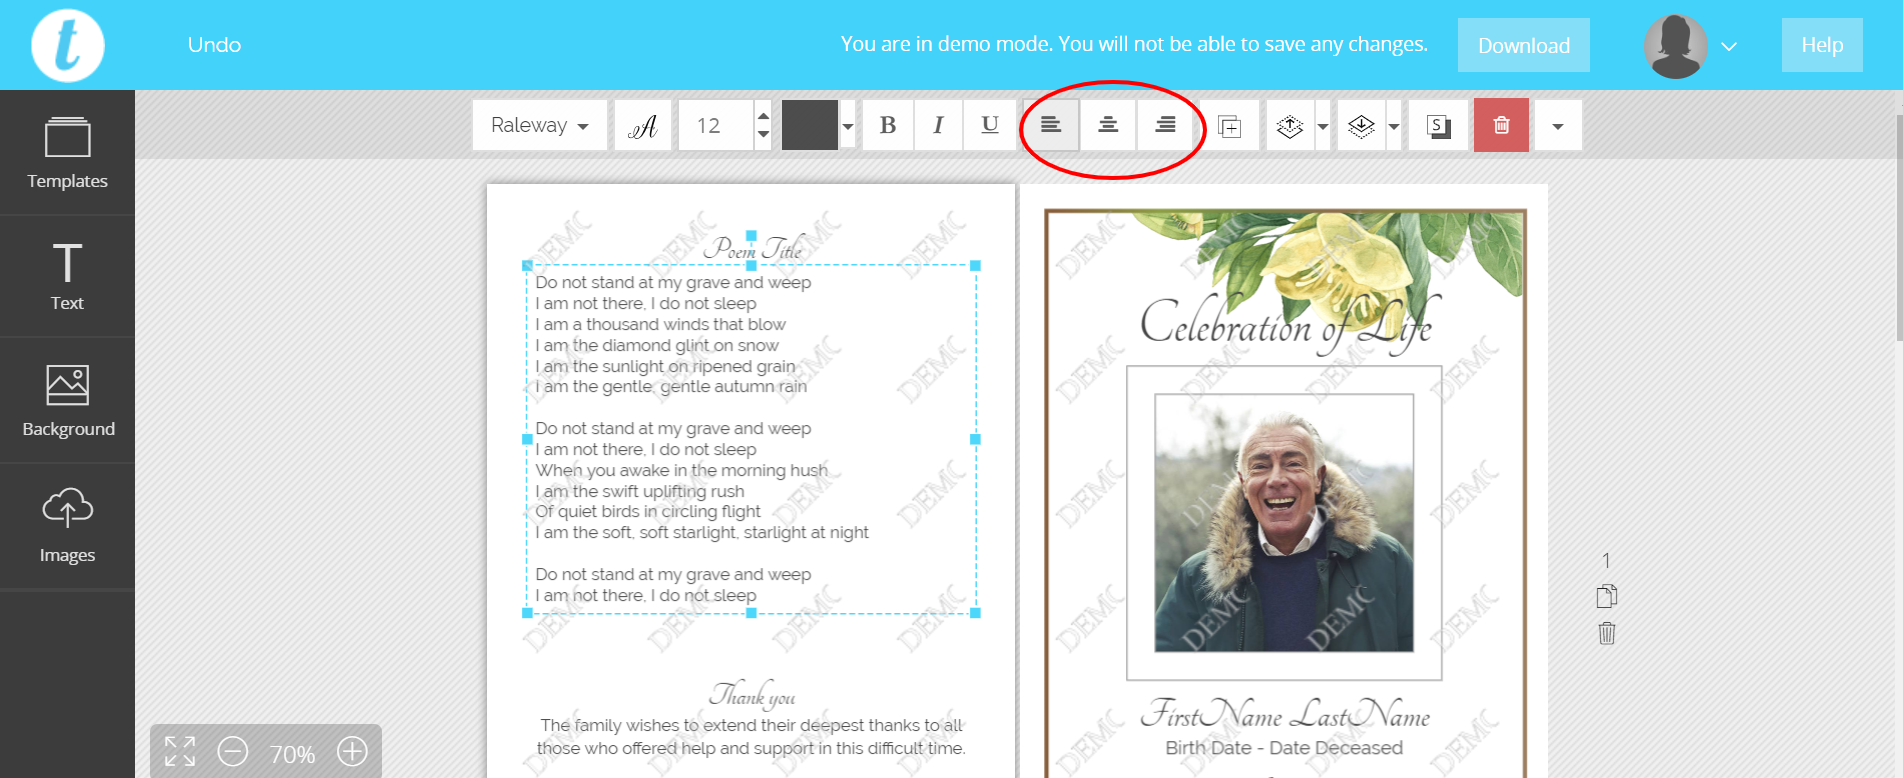
The text can be aligned to the left, center or right. The alignment controls are in the upper menu bar, and are represented by three lines. Choose the left, middle or right alignment from the three selections.
Line-height and Character Spacing
Finally, the last way to edit text that will help make your funeral program perfect is line height and character spacing.
In the upper menu bar, there is a small triangle. If you click the triangle, you will see a drop down with several choices.
Line-height changes the space between the lines of text. You can make the lines of text more have more space between them, or squish them together more. Lowering the line-height will put the lines closer together. But, be aware that this will also make the text harder to read. It is a good idea to minimize the amount of text you would like to include, and keep the font-size and line-height legible.
The character spacing option is not needed very often, as the text is already at the smallest character spacing when you add it. Increasing the character spacing will increase the amount of space between each character. This is good to emphasize certain words or areas.